Before you open the camera
A passport photo can look fine on your phone and still be the wrong file for the application. Before taking the picture, find out whether the receiving route expects a digital upload, a printed photograph or both.
Write down the requirements shown by the current portal or authority. A short note about the route keeps the capture setup, later crop and final export connected to the job you actually need to finish.
| Submission route | Check before capture | Why it changes the setup |
|---|---|---|
| Digital upload | Pixel dimensions, format, file limit and any rule about face position | The source needs enough space for the final crop and enough quality for the upload. |
| Printed application | Physical width and height, paper and copy count | The final output must be printed at the requested size, not just resized on screen. |
| Embassy or visa centre submission | Whether a photographer, print or recent capture is required | Some routes add conditions involving a person or provider that home capture cannot supply. |
| Child or infant application | Exceptions based on age for eyes, expression and support | The safest pose and the allowed exceptions depend on the current authority guidance. |
Keep the official notice open while you work. A general home photography method can improve the source, but it cannot replace an instruction specific to the route.
Set up the room and background
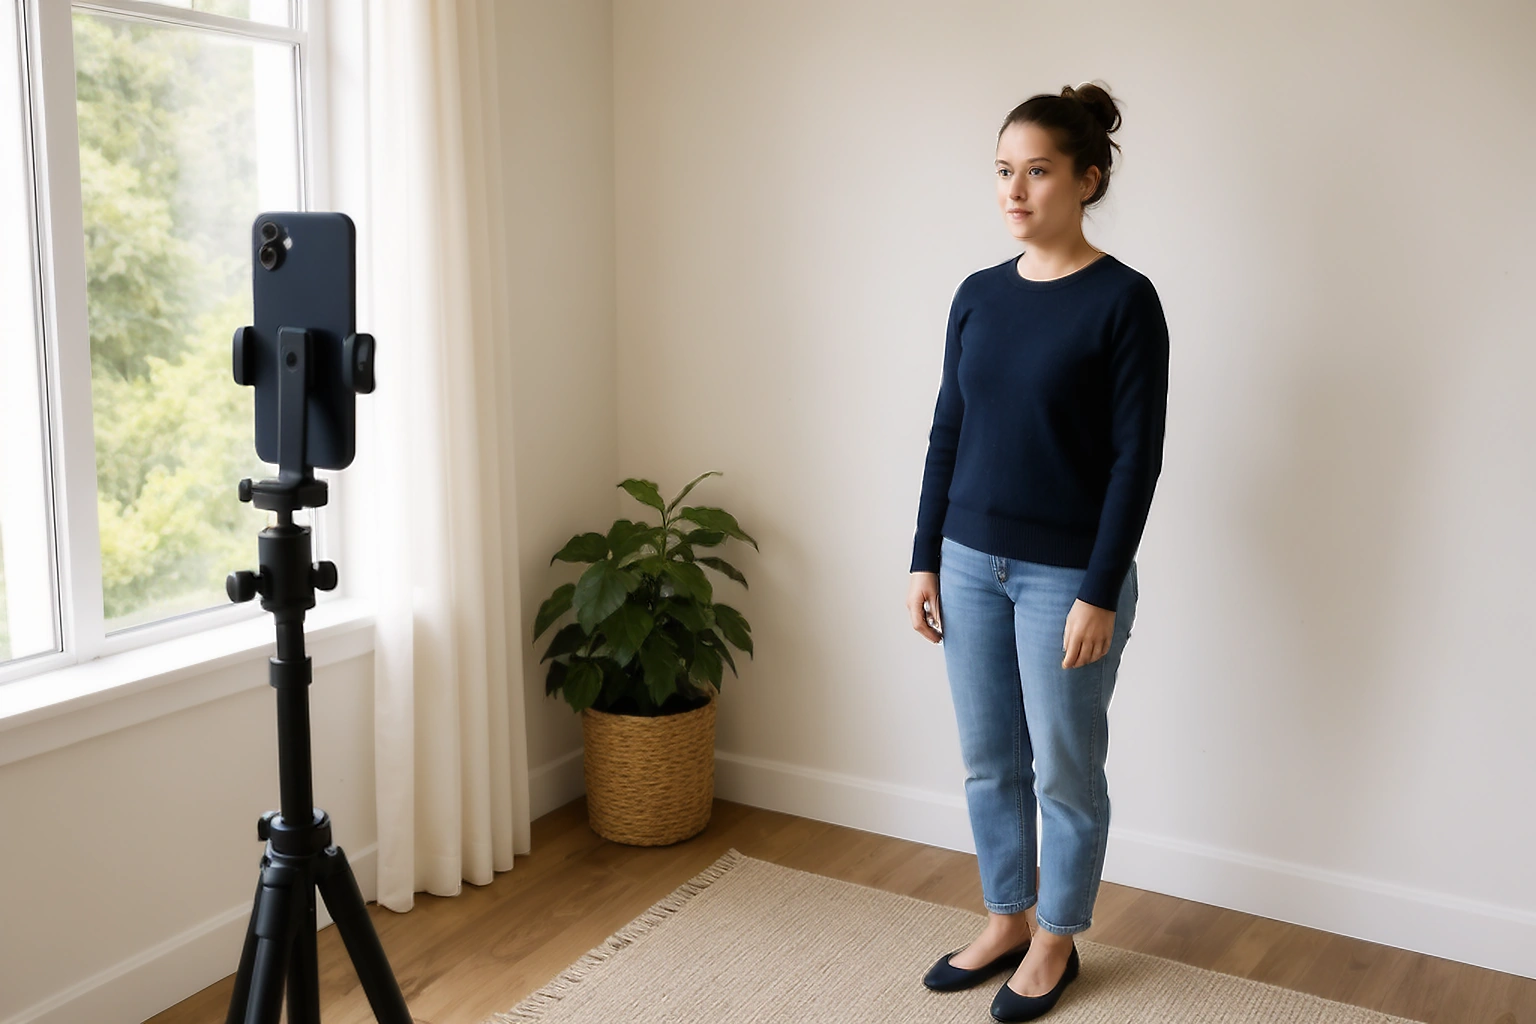
Choose a plain light wall and move the subject away from it. A small gap reduces the hard shadow that appears when a person stands directly against the wall.
Place the subject where light reaches the face from in front, not only from one side. The UK home photo guidance describes a plain light background with even light, while the U.S. Department of State guidance warns against shadows, glare and digital changes.
- Use a plain light wall with no pictures, furniture or visible objects behind the head.
- Face a large window or another soft light source so both sides of the face are visible.
- Leave space between the subject and wall to reduce a dark outline or cast shadow.
- Remove reflective glasses, hats or hair that cover the eyes unless the current route gives an exception.
Place the phone at the right distance
A close selfie changes facial proportions and leaves little room for the final crop. Put the phone far enough away to capture the head and shoulders naturally, then use the crop tool after you have chosen the strongest frame.
The UK guidance gives a useful example of a photographer standing about 1.5 metres away while the subject stands at least 50 centimetres from the background. Treat those figures as guidance for that route, not as a universal rule for every authority.
| Setup choice | What to do | What it prevents |
|---|---|---|
| Phone height | Keep the lens close to eye level | A high or low lens can change the apparent shape of the face. |
| Subject distance | Start around 1.5 metres, then check the framing | A close perspective can enlarge the nose and tighten the crop. |
| Wall distance | Leave a clear gap behind the shoulders | A direct wall position can create a hard head shadow. |
| Framing | Include head, shoulders and breathing room | A tight capture can cut hair, chin or shoulder detail during resizing. |
Use a tripod and timer if nobody can operate the phone. A helper is sometimes better because they can watch the framing, adjust the phone height and take several consistent frames.
Take the photograph without using a close selfie
Ask the subject to face the camera directly, keep the head level and relax the mouth. Look at the lens rather than the screen so the eyes stay directed toward the camera.
Take several frames without filters or portrait effects. Keep the original resolution and avoid sending the photograph through a messaging app before you choose the source, because some apps recompress images.
| Choice | Recommended approach | Reason |
|---|---|---|
| Camera | Use the clearest camera available at a natural distance | The source should preserve facial detail without distortion caused by holding the camera too close. |
| Expression | Keep the mouth relaxed and follow the route’s expression rule | Different authorities describe neutral or natural expression differently. |
| Eyes and glasses | Make sure both eyes are visible without glare | Reflections and blocked pupils can create a capture problem rather than an editing problem. |
| Number of frames | Take a small set of calm, similar frames | Several options make it easier to reject a blink or momentary shadow. |
Review the photo before editing
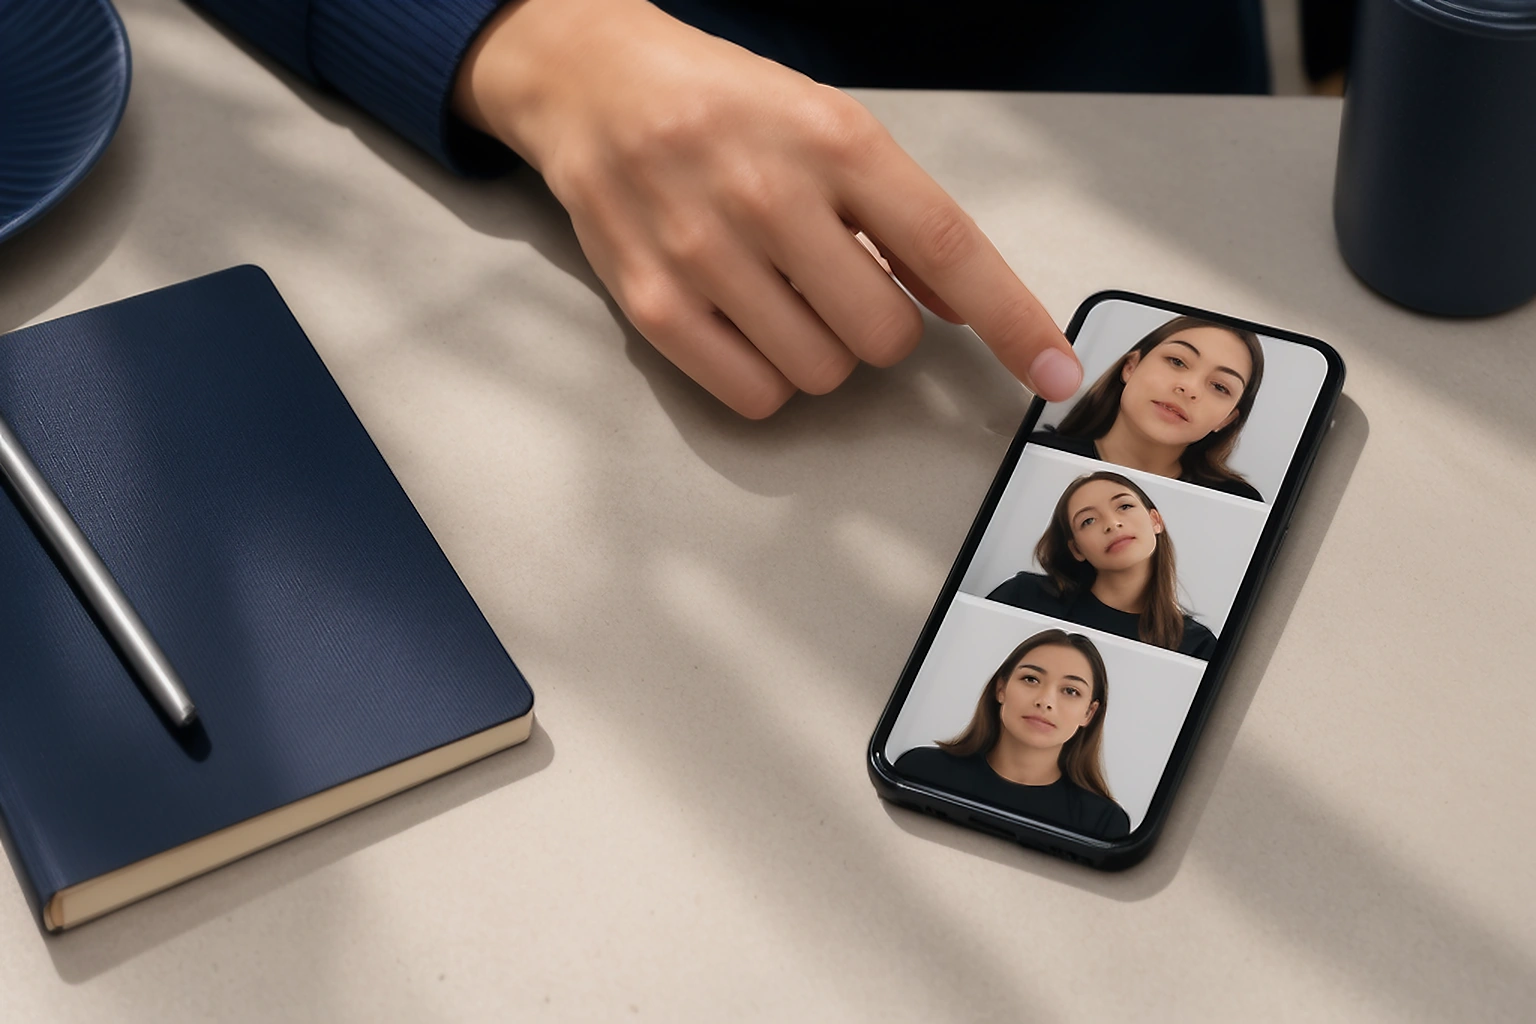
Do not begin by trying to fix every frame. First choose the original photograph with the clearest eyes, the most even light and enough space around the head.
Open the image at full size and inspect the face, hair edges, background, glare and focus. If the source has a blocked eye, strong blur or a chin cropped by the frame, another capture is safer than an aggressive correction.
Check focus
Read the eyes and hair detail at full size.
Check expression
Use the expression described by the receiving route.
Check the background
Look for shadows, colour patches and objects.
Check the crop room
Make sure the head and shoulders are not cut off.
Check the light
Look for glare, strong side shadow and uneven exposure.
Check the original
Keep the clearest camera file before making a copy.
Check the route
Compare the source with the current application notice.
Only after this review should you crop, resize or prepare a permitted background. Separating capture problems from output settings prevents repeated edits to a weak source.
What changes by country and application route
The answer to “can I take a passport photo at home?” depends on the exact application route. A digital upload, a printed application and an online renewal can use different source rules even when they use the same word, passport.
| Route | What the current guidance says | Practical decision |
|---|---|---|
| United Kingdom digital photo | Home capture is allowed when the digital photo follows the published rules. Another person can help take it. | Check the UK digital photo rules |
| United States online upload | An eligible digital photo can be uploaded, but the original must follow the official photo guidance and not be digitally altered. | Check the U.S. photo guidance |
| Canada online adult renewal | The digital photo must be taken in person by a commercial photographer for the online renewal route. | Check Canada online renewal |
| Australia passport | The Passport Office recommends an experienced passport photo provider and does not recommend online services or mobile apps. | Check Australian photo guidance |
These are route examples, not a substitute for the notice attached to your application. If the required source must come from a provider, do not use a home capture simply because the image looks clear.
Check the Indian application route before preparing a photo
India shows why a country name alone is not enough. The current Passport Seva application booklet says photographs are not required at Passport Seva Kendras or Post Office Passport Seva Kendras, while another collection centre can ask for a colour photograph with a plain white background and specified dimensions.
Read the Passport Seva application instruction booklet for the route you are using. Do not prepare a printed photo for a PSK or POPSK visit just because a general online article lists a common Indian passport photo size.
The difference between a safe preparation and a retake
Editing is useful when the source is truthful and the change only prepares its presentation for the selected route. A retake is safer when the camera failed to capture the required facial detail in the first place.
- Safe preparation: crop the clear original to the selected canvas.
- Safe preparation: resize or compress the file to the route’s stated output.
- Retake: focus missed the eyes or important facial detail is blurred.
- Retake: glare, a blocked eye or a head cropped by the frame cannot be corrected truthfully.
The Government of Canada describes editing software, filters, background changes and appearance corrections as alterations. The U.S. Department of State also says not to digitally alter a passport photo. Check the route before using any automated correction.
How to prepare the file after capture
Once you have a clear source, keep the preparation decisions in the same order: select the route, set the crop, review the face and background, resize the canvas, then reduce the file size only when the application asks for it.
Use the tool that matches the output rather than forcing one control to handle every task.
When an authority asks for a digital original, upload the saved camera file or the permitted prepared export directly. Avoid screenshots and avoid routing the file through a service that can change its compression.
Prepare the photo after you capture it
Choose the application profile, set the crop and review the saved file before you upload or print.
Check the file that you actually saved
The preview inside a tool is not the file a portal receives. Open the downloaded image and confirm that its dimensions, format and file size match the current route.
- Open the saved file from the location where it was downloaded.
- Confirm the extension and pixel dimensions, then check the file size.
- View the image at full size for blur, glare, shadows and accidental crop changes.
- Upload the saved file directly and keep a note of the filename used.
For a printed application, confirm the paper setting and print at 100% or Actual Size. A correct canvas shown on screen can become the wrong physical size if the printer scales it to fit the page.
Keep the original until the application is complete
Keep the untouched phone photograph and make working copies for each output. If a portal reports a new error, returning to the original is safer than trying to repair a compressed or repeatedly resized version.
Use filenames that describe the route and output. This is especially useful when one capture supports a digital upload and a separate printed application.
uk-digital-original.jpgfor the untouched camera file.uk-digital-upload.jpgfor the checked upload export.canada-photographer-file.jpgfor a file supplied by a commercial photographer.india-collection-centre-print.jpgfor a route that asks for a physical photograph.
Do not keep personal images longer than you need them. Once the application and any support question are finished, remove copies that no longer have a practical purpose.
Common home photography mistakes
The camera is too close
A close selfie can make the centre of the face look larger and leaves no room to set the final crop. Move the phone back and use a timer or helper.
The phone is tilted
A phone pointed down or up changes the head angle and can make the frame look uneven. Set the lens at eye level before taking several frames.
The face is bright but the wall is dark
Side light can leave a strong shadow on the background. Turn the subject toward soft front light and leave a gap from the wall.
The file passed through a messaging app
Automatic compression can remove detail before you have checked the image. Keep the camera file and share it through a route that preserves the original.
Also remove the shortcuts that change appearance or hide detail:
- Beauty filters or skin smoothing that changes the face.
- Portrait effects that blur or replace the background around hair.
- Sunglasses, lens glare or accessories that cover the eyes.
- A crop that cuts the hair, chin or required shoulder area.
If one of these problems is present in the original frame, take another photograph before opening an editor. A clean capture sometimes gives you more control than a complicated repair.
sometimes asked questions
Can I take a passport photo at home with my phone?
For some applications, yes. The United Kingdom allows home capture for its digital route when the photo follows the current rules, and the United States accepts an eligible digital photo for an online application. Canada’s online adult renewal route requires a photo taken in person by a commercial photographer, while Australia recommends an experienced passport photo provider rather than an online service or mobile app.
How far should my phone be from me?
Use enough distance to avoid a close selfie perspective and keep the phone at eye level. A practical starting point is around 1.5 metres from the subject, then adjust for the camera and room so the head and shoulders fit with space around them. The final crop and face measurements come from the receiving authority, not one universal distance.
Should I use the front or rear camera?
Use the camera that gives the clearest, least distorted result. The rear camera can provide strong quality, but it is harder to frame without help. Ask another person to operate the phone or use a tripod with a timer instead of holding the phone close to your face.
Can I remove the background or retouch my face?
Do not assume that background replacement or facial retouching is allowed. The United States says not to digitally alter a passport photo, and Canada treats changes such as background edits, filters, cropping and appearance corrections as alterations. Follow the current route before changing anything beyond permitted preparation.
What should I do if the photo looks good but the portal rejects it?
Record the exact error and check the file you uploaded, not just the editor preview. Confirm the dimensions, format, file size, crop, face position and the route selected in the portal. If the message points to blur, glare, closed eyes or missing facial detail, take a new photograph instead of repeatedly compressing the same source.
Should I keep the original phone photograph?
Yes. Keep the untouched original until the application is complete and any support question is resolved. Make working copies for cropping, resizing or compression so you can return to the clearest source when a portal asks for a different output.
Final checklist
Use this short check immediately before uploading or printing:
- The route, document and submission channel are confirmed.
- The face is clear, facing forward and free from avoidable glare or obstruction.
- The background, crop, dimensions, format and file size match the current instructions.
- The saved output was opened and checked, while the untouched original remains available.
If the authority requires a professional capture, photographer details or a physical print, complete that part through the required route rather than treating the home setup as a replacement.
A phone can capture the photo, but the setup decides the result
A home passport photo workflow begins with a clear source, a sensible camera distance and light that does not create shadows or glare. After capture, keep the original and prepare the output around the exact route instead of applying one generic passport photo setting.
When a country or application requires a commercial photographer, a specific print process or an unaltered source, follow that instruction. The safest workflow is the one that makes the source easy to review and the final file easy to identify.
Official sources checked
The guidance in this article was checked against the following public authority pages. Requirements can change, so open the relevant source again before submission.
Last checked August 29, 2026.