A background can look fine and still create a problem
A background can look white in your phone gallery and still show a shadow, wall texture, uneven lighting, or a faint corner line when the image is uploaded. These small details sometimes show up around the hair and shoulders first.
Before changing the passport photo background, open the instructions for the exact passport, visa, identity document, or online application. The safest edit is one that improves the presentation without changing the person's face, natural skin tone, hair outline, or expression.
PassportPhotoBox can help you prepare and review the image. It cannot decide whether a particular authority will accept the final photo, so keep the official requirements open while checking the result.
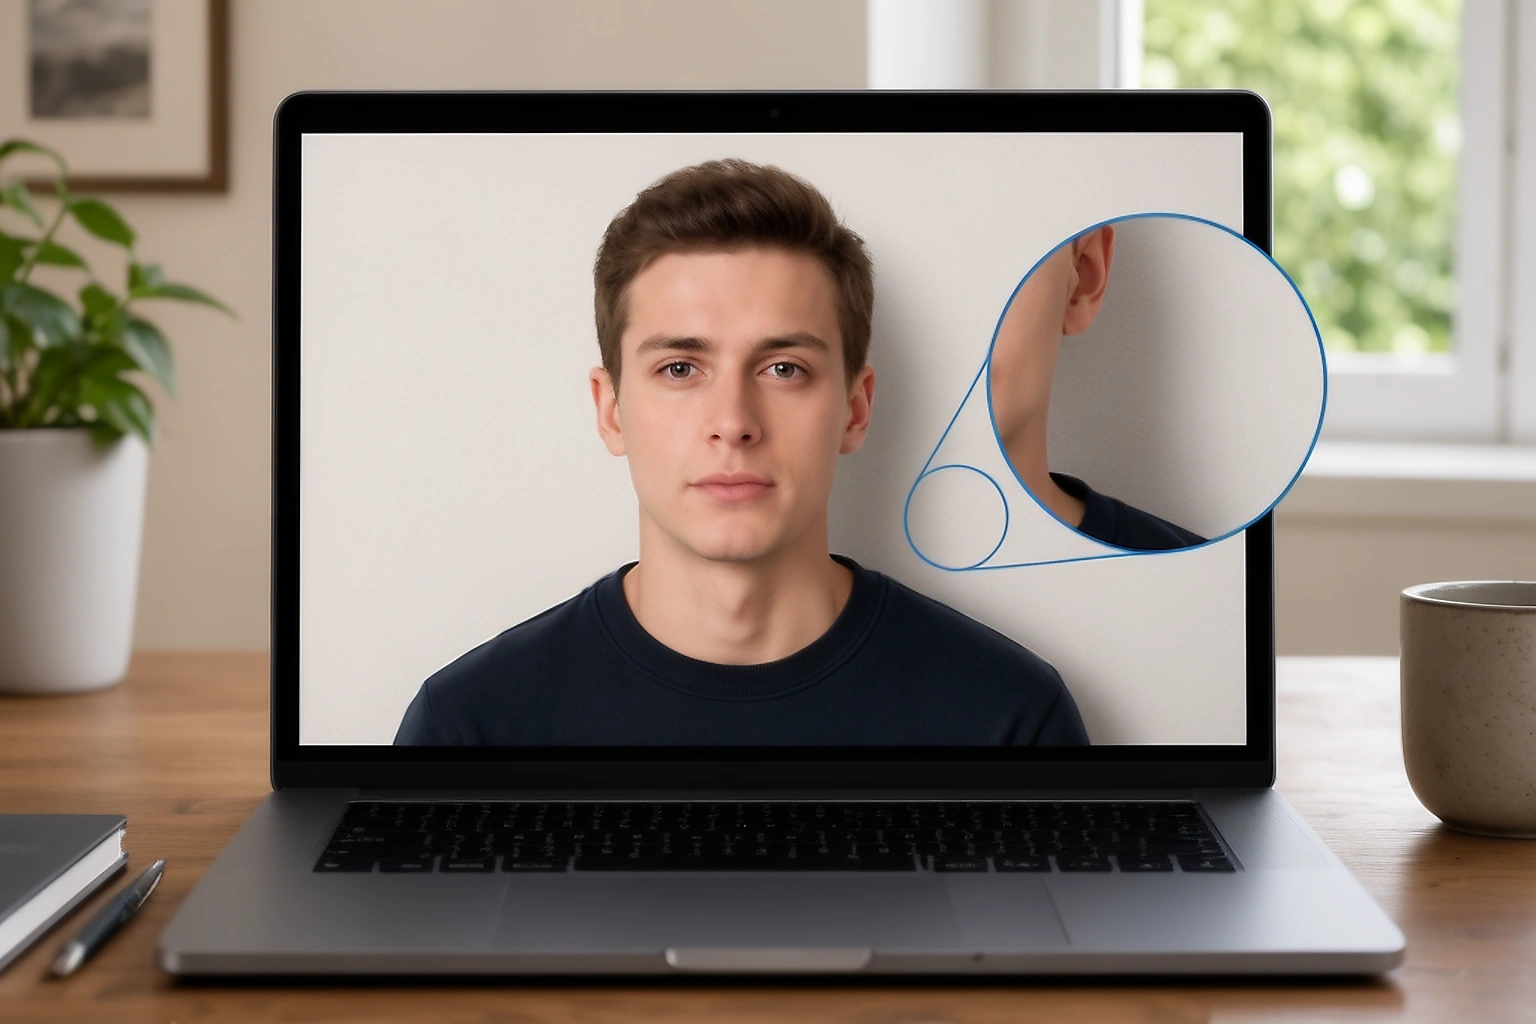
A plain wall is not automatically a compliant passport photo background. The image can contain a dark patch behind the head, a curtain pattern, a visible object, a wall joint, or a shadow caused by the flash.
These problems can become easier to see after cropping or reducing the image. A face can also blend into a pale background when the clothing and skin have similar brightness. The first place to inspect is the area immediately around the hair, ears, neck, and shoulders.
Use this four point review before editing:
| Check | What to look for | Why it helps |
|---|---|---|
| Plainness | No objects, patterns, strong texture, lines, or visible wall corners | Keeps attention on the face and gives the outline a clean edge |
| Lighting | No hard shadow behind the head or across the face | Prevents the face and background from appearing uneven |
| Contrast | The face, hair, and clothing remain separate from the background | Stops facial edges from blending into the wall |
| Colour | The background matches the current application instruction | Prevents the use of a colour that belongs to a different document route |
A useful test is to enlarge the photo and inspect the four sides of the head. If the background colour changes sharply near the hair, the image can need better lighting or a new photo rather than a quick colour replacement.
Four checks before changing the background
Changing the background should not be the first decision. Start with the original photo and answer these questions:
Is the face sharp and clearly visible?
If the eyes are blurred, the face is covered by glare, or the camera missed focus, background editing will not restore the missing detail.
Is the current background allowed?
White, off white, light grey, cream, and blue are not universal choices. The exact document instructions decide which colour is suitable.
Is the lighting even?
Look for shadows on the face, a bright patch on the forehead, and a dark area behind the head. Uneven light can make a replacement background look artificial.
Will the exported file still meet the upload rules?
The photo can look correct inside an editor but fail after export because of its format, pixel dimensions, file size, or compression.
This order saves time. A background edit cannot repair a blurred face, incorrect head position, cut off hair, or glare over the eyes.
White, light grey, and blue are not interchangeable
Several official photo pages use white or a pale background, but their wording is not identical.
The United States Department of State asks for a plain white or off white background. Canada refers to a plain white or light coloured background. The United Kingdom accepts a plain light coloured background and gives light grey or cream as examples. Australian passport guidance specifies a plain white or light grey background that contrasts with the face.
These differences are important because they show why one colour should not be treated as a universal rule.
| Application example | Background wording | Practical reading |
|---|---|---|
| United States passport photo | Plain white or off white | Avoid objects, texture, and visible shadows |
| Canadian passport photo | Plain white or light coloured | The background should remain plain and even |
| United Kingdom passport photo | Plain light coloured background | Light grey or cream can be suitable under the stated rules |
| Australian passport photo | Plain white or light grey | The face should remain clearly separated from the background |
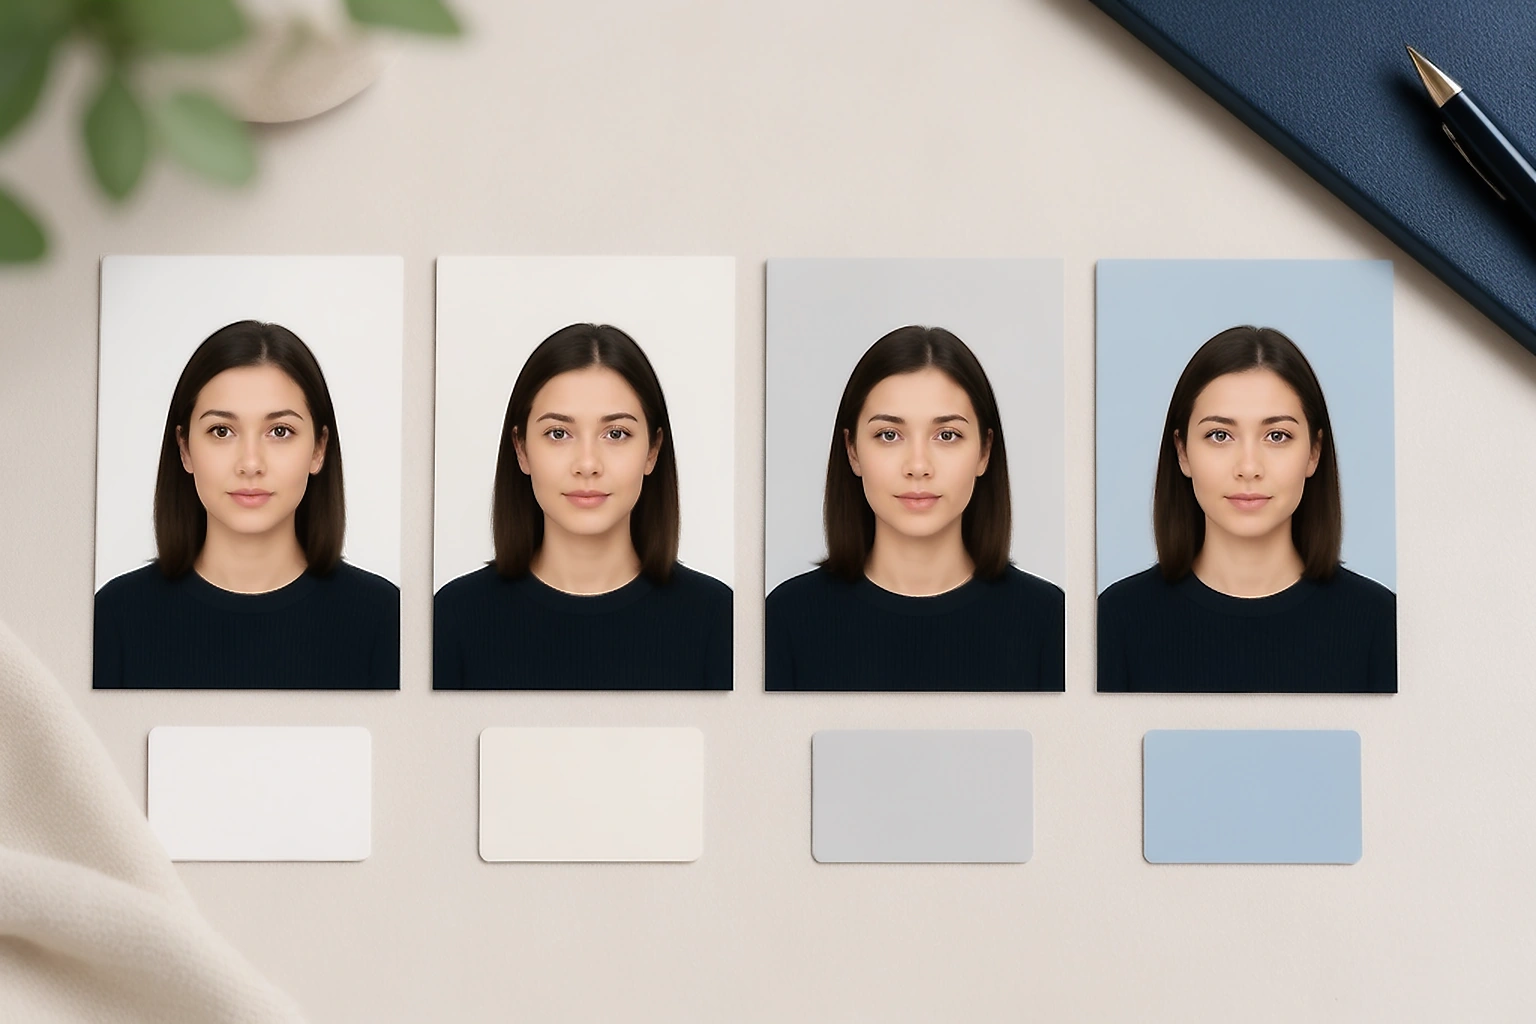
A blue background should not be selected simply because it looks clean. Use blue only when the instructions for the exact application clearly permit it. A colour accepted for one visa, identity document, or regional application can be unsuitable for another.
Do not use a digital colour value such as #FFFFFF as proof that an authority requires one exact shade. Official wording can describe the background as white, slightly off white, light coloured, or light grey without providing a colour code.
A practical review from the original photo to the saved file
Imagine a clear phone photo taken against a wall with a dark shadow near one shoulder. The face is sharp, the eyes are visible, and the head is fully inside the frame. In that situation, the background is the part that deserves attention.
Keep the original image safe first. Next, read the current application instruction and confirm whether background correction is allowed. Review the crop and face position before touching the colour. If the edit is permitted, change only the background area and leave the face, hair edge, skin tone, and clothing untouched.
Export a test copy and open it outside the editor. Check the area around the hair and shoulders for a pale halo, jagged edge, or sudden change in brightness. If the background looks artificial, return to the original file instead of repeatedly editing the compressed copy.
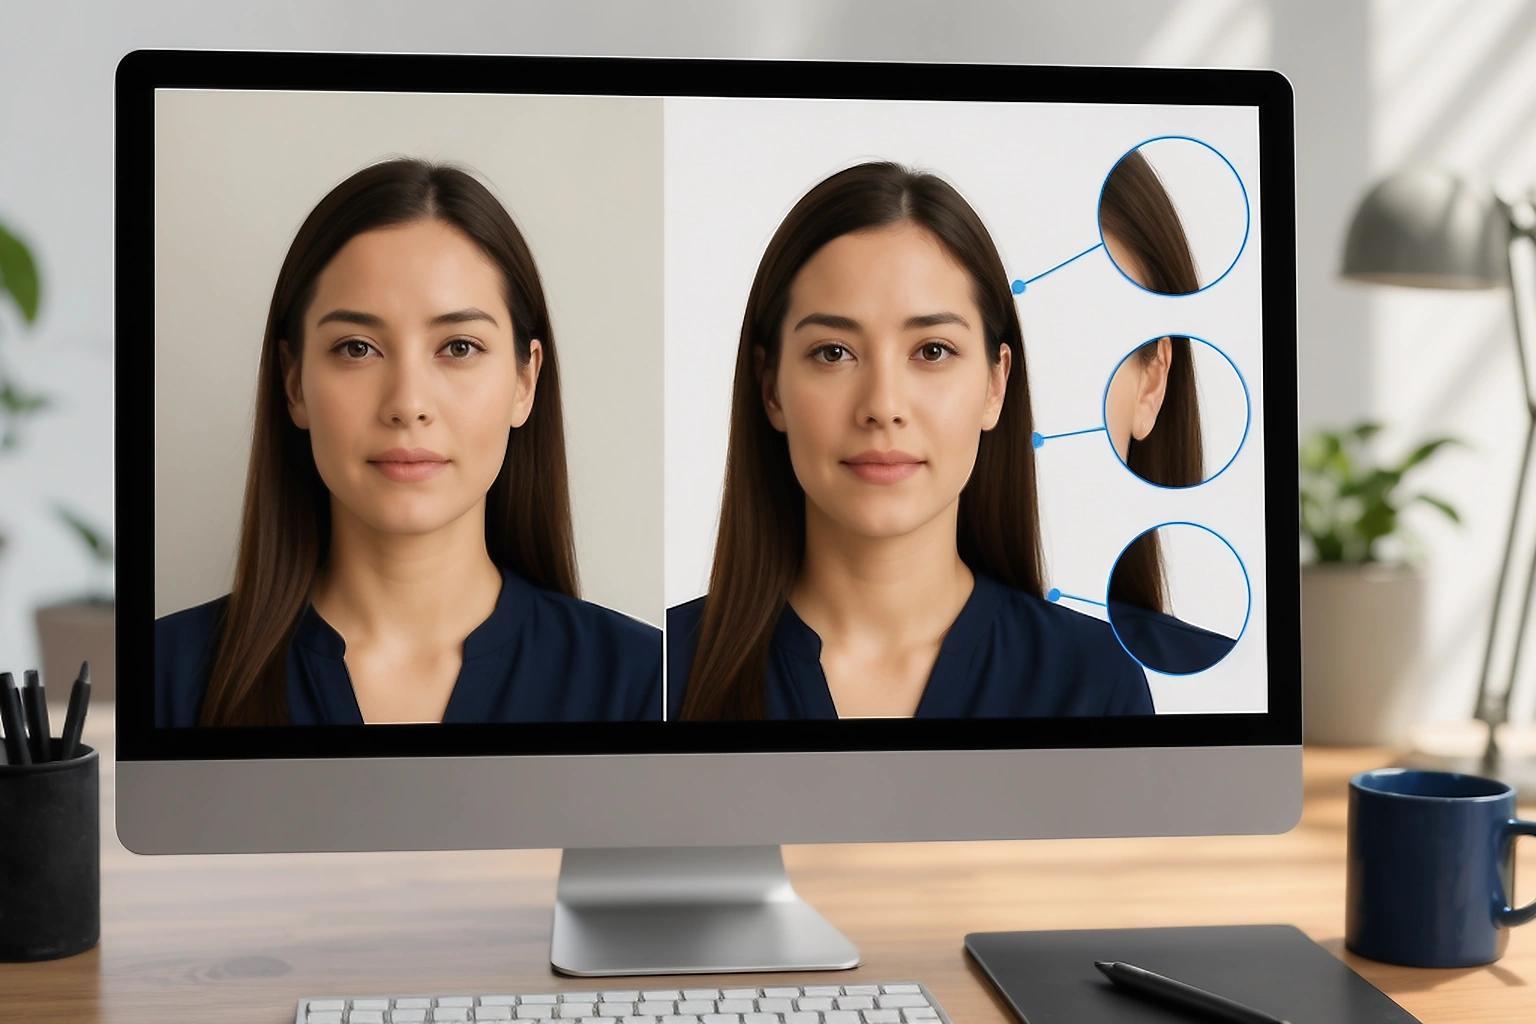
The mistake I see in rushed submissions is checking only the editor preview. The saved file deserves its own review because that is the file the portal receives.
Do not confuse background rules with file rules
Background approval and upload approval are separate checks. A photo can have a suitable background but still fail because the saved file is too large, too small, or in the wrong format.
The following official examples show why the final application instructions must be checked separately:
| Official route | Published technical example |
|---|---|
| United Kingdom digital passport photo | At least 600 × 750 pixels and between 50 KB and 10 MB |
| United States online passport renewal | Between 54 KB and 10 MB, with supported image formats listed by the Department of State |
| Canadian passport photo | Digital images from 1,200 × 1,800 to 3,000 × 4,500 pixels and between 200 KB and 5 MB |
| Australian printed passport photo | Between 35 and 40 mm wide, 45 and 50 mm high, with a face height between 32 and 36 mm |
These figures are examples, not a universal passport photo checklist. The United Kingdom figures apply to its digital passport service, while the Canadian and Australian figures belong to their own application routes.
When to correct the background and when to retake the photo
A small presentation issue can be correctable when the face is already clear and the application allows the adjustment. A retake is safer when the edit would need to recreate missing facial detail or hide a problem over the face.
| Problem in the original photo | Possible correction | When a retake is safer |
|---|---|---|
| Slight shadow beside the shoulder | Improve the background only if the route permits it | The shadow crosses the face or changes the head outline |
| Uneven wall colour | Use a permitted correction while keeping the face untouched | The correction creates a visible halo around the hair |
| Texture or small object behind the person | Take a new photo against a plain background | The object touches the head or cannot be removed cleanly |
| Blur, glare, or cut off head | Use a clearer original if one exists | The eyes are unclear, glare covers the pupils, or the frame cuts the head |
A simple rule helps here: correct the space around the person only when the person is already captured clearly. When the edit has to rebuild a facial edge or disguise poor focus, another photo is the more reliable choice.
The final image should still look like the same person who stood in front of the camera. A background change should not become a facial reconstruction.
What a photo checker can and cannot decide
A checker can help identify visible problems and file details. It cannot know a requirement that was not included in its selected profile, and it cannot promise that an immigration office, passport service, visa centre, or other authority will accept the image.
| A checker can help review | You still need to decide |
|---|---|
| Background colour and visible uniformity | Whether that colour is allowed for the exact application |
| Shadows, glare, and distracting objects | Whether a new photo is required |
| The edge around the hair, face, and shoulders | Whether the edit remains faithful to the original |
| File format, dimensions, and file size | Whether the receiving authority has changed its rules |
Use the tool as a preparation step. Keep the official application page beside the result and compare the final file with the wording that applies to your document.
Why the downloaded file needs a separate check
The preview is a working view. The downloaded file is the image that reaches the portal, email attachment, printer, or document system.
Open the saved file on your device and check these four points:
- Confirm the file format and extension.
Make sure the file is saved in the format requested by the application. Do not assume that renaming an extension changes the actual image format.
- Confirm the pixel dimensions.
Check the width and height after export. Cropping or saving through another application can change them.
- Confirm the file size.
A file can become too large after export or too small after aggressive compression. Compare it with the upload range in the current instructions.
- Inspect the visible result.
Look again at the background edge, hair, skin tone, eyes, and overall sharpness. A reduced file can show a problem that was not clear in the editor.
Do not upload a screenshot of the preview. If the portal displays an error, record its exact wording and correct that one issue first. Changing several settings together makes it difficult to understand what solved the problem.
Final passport photo background checklist
Before submitting the file, confirm the following:
- The background colour matches the current instructions for the exact application.
- The background is plain, evenly lit, and free from distracting objects or patterns.
- The face, hair edge, skin tone, expression, and crop remain natural.
- The downloaded file matches the required format, pixel dimensions, and file size.
Keep the original and final export in separate folders until the application is complete. Give the final file a clear name so you can identify the version that was actually uploaded.
sometimes asked questions
Can I change the background of a passport photo?
Only when the instructions for that application allow the change. The edit should not change the face, hair outline, expression, or natural skin tone. If the original lighting is poor or the face is unclear, take another photo instead.
What colour should a passport photo background be?
There is no single colour for every application. White or off white appears in several official instructions, while some routes use light grey, cream, or another specified option. Check the current instructions for the exact document before editing.
Can I use a blue background for a passport photo?
Use blue only when the exact application instructions permit it. Blue is not a safe general replacement for white or light grey. A colour accepted by one route can be unsuitable for another.
How do I check a passport photo background before submission?
Look for a plain and even background, then inspect shadows, glare, texture, objects, and the edge around the head. Check the saved file separately because the exported image can not look identical to the editor preview.
Should I edit the original passport photo?
Keep the clearest original file safe and work from a copy. Repeated editing of a reduced file can soften the face and make it difficult to identify which version was submitted.
Can a white wall be used for a passport photo?
A white wall can work when it appears plain, evenly lit, and free from shadows or texture. The wall colour alone is not enough. Check the visible result and compare it with the current application instructions.
The short conclusion
A suitable passport photo background is not simply the lightest colour you can create. It is the colour and presentation accepted by the current application instructions, with a clean edge around the face and no distracting shadow or object.
Check the original photo first, make only a permitted correction, and inspect the downloaded file before submission. That small final review can prevent a technically correct edit from being changed during export.
Review your photo before submission
Open the PassportPhotoBox checker to review the background, visible photo issues, and saved file details. Keep the official application instructions open because the final decision belongs to the receiving authority.
Official sources checked on 30 August 2026
Background wording differs between authorities. These pages are included so readers can compare the exact instructions rather than treating one background colour as universal.